
The little one that can!
I learned how to shoot with a 4×5 camera, so anything smaller was always considered, well smaller! 35mm format created a tiny slide when laid down on a light table, especially next to a 6x7cm or 4×5” sheet of film. When viewing 35mm slides I was constantly wishing I had taken the shot on a larger format. I even recall continually looking for the loupe, which was always misplaced.
In spite of my personal bias for larger formats, I was forced to shoot with a 35mm camera to capture downhill skiing and rock climbing. For everything else, not requiring a motor drive or super-quick autofocus, I did eventually manage to take some interesting images with smaller cameras. In fact, I ended up purchasing one of my very favorite cameras of all time the Contax G2. This was a little range finder with several very high-quality lenses. I only used this camera for two years before I went digital. The irony for me was that just when I discovered a great film camera — and Fuji and Kodak had created their very best emulsions EVER — I no longer needed them. No worries, this is not a post about film vs. digital but rather large vs. small.
I believe that small point and shoot cameras fall into a dangerous category for most, where due to the number of bells and whistles included, our intimidation meter spikes. Since they are neither large nor tiny, we have next to no respect for them as an object of reverence. However, what I want to point out in this post is just how effective this size camera can be if a few potential misconceptions are cleared up and a few simple steps are taken.
My personal bias for larger formats has completely changed over the past six years. All of my large format equipment is in the very same place it has been for the past six years — in my office. I have come to realize several very interesting points about using different size cameras because of the number of different shaped and sized cameras I have used over the past decade.
The very first point I would like to stress is that it just seems to be human nature to take larger items more seriously. Because of this one single factor, it is rare to see anyone taking anything other than snapshots with their point-and-shoot cameras.
The other interesting point about size is when a camera becomes tiny, that is smaller than a pocket-sized point and shoot, people begin to lose all inhibitions. A great example is the iPhone!
It’s is not simply size that impacts our respect, but also our perception of the camera’s sophistication. The more sophisticated an object appears the more intimidated we are by it and the more we respect it.
It’s fun to watch kids take pictures with iPhones. They simply take pictures of what captivates them at that moment. There is no hesitation because of focus, light, focal length or anything! The creativity seems to flow, and it flows as fast as the camera can keep up.
So where does this leave us with the point-and-shoot camera?
I believe it is all about the way you perceive that little box in your hands.
The beauty of the point and shoot is in its versatility. You can use it to replace most shots taken with an SLR or use it to replace an iPhone with no techno gadget impediments between you and your creative thoughts, it’s all how you set it up and use it!
First, consider what you can do with it to replace an SLR that you have been using for several years. The issue most have with a point and shoot is its lack of quality. This can be true, but with recent developments in technology there are several point-and-shoot cameras that can kick some major &^*! The Canon S90 is one that I recommend because of its pocket size and large sensor. The sensor is larger than most point and shoots, but contained within a camera that fits into your pocket. The lens has an adequate range to capture most scenes.
I have been using a Canon G9 and G10 prior to the s90 for the purpose of understanding more about how the equipment I use affects my work. What I have discovered, is that the work I create with the smaller cameras depends entirely on the type of image I choose to shoot. At first, I did not attempt any particular type or style of image but just went out to shoot, knowing I wanted to use the camera I had in my hands.
When shooting a landscape image, I compose in the same manner and use as many of the manual overrides as I can to match the settings on my SLR. Here are a few tips to creating images with a small point and shoot that make the results look similar to an SLR.
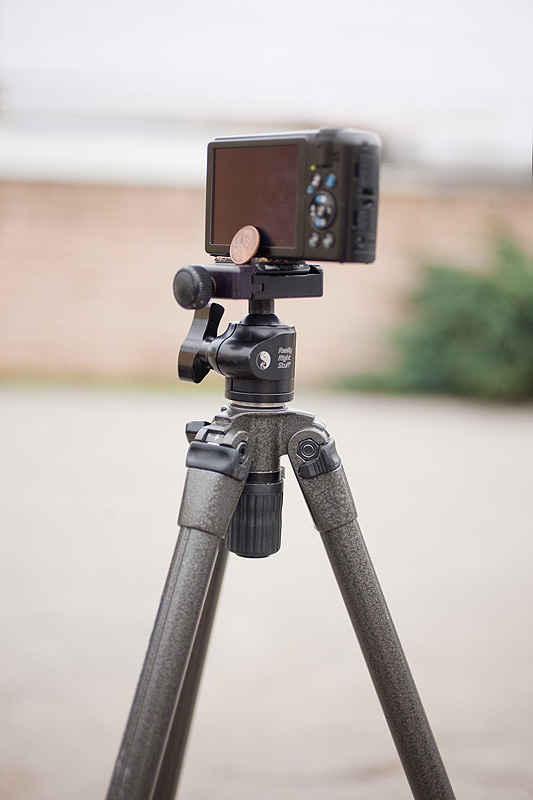
- Use a tripod! This is the number one factor in beginning to take this little guy seriously. By simply placing the camera on a tripod you will begin to study the composition more carefully just as you do with your SLR.
- I use a Really Right Stuff (small Bi-directional plate) and a small BH25 ball head, that allows me to place the camera very quickly on the tripod, so there are fewer excuses for not using the tripod. The tripod I recommend is the little Slik Sprint Pro 3way. I love to flip all the clamps open on one leg and watch it fall to the ground with gravity. I also have taken out the bottom of the center column to lose even more weight. With it gone I can get even closer to the ground, as well.
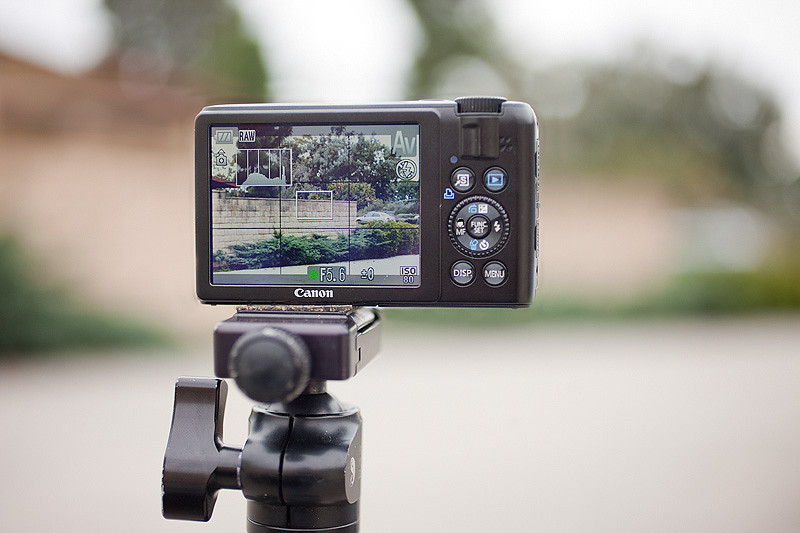
- Set the file format to RAW. This will allow you to maximize the file in post or photoshop if you have it.
- Use the manual meter mode with the histogram displayed. This is the very best way to meter, even on a SLR. Because the histogram is not as sensitive as on most SLRs you will need to compensate a bit. For example, when viewing this histogram for clipped highlights, I usually underexpose by an additional 1/3 of a stop just in case.
- Shoot with some of the same practices you might with your SLR. Take multiple bracketed exposures for HDR. Take multiple exposures for different focus points to create sharp detail in the foreground as well as the back ground, (to be combined later in post).
Ok, those are some examples of how to use a point and shoot with respect. This ought to satisfy your sophistication requirements for it as well. Next, consider it an iPhone. It is now a toy!
- Set the camera to fully auto and simply shoot. Don’t worry about setting the resolution to RAW file format or manual meter, just fully auto and shoot.
- Shoot with the camera at different angles, such as over your head, under your feet, or better yet, under your dog’s feet. Well, you get the idea! If you want to make the camera go a bit faster, there is one manual tweak, turn off the flash. The single most important tip for taking these kinds of moment by moment inspired images is to have the camera with you. Get yourself a pouch for it to hang from your belt, or find a location in your purse. The point is for this type of photography, it needs to be considered a toy, not a sophisticated camera. Think, there are no manual overrides. JUST SHOOT!
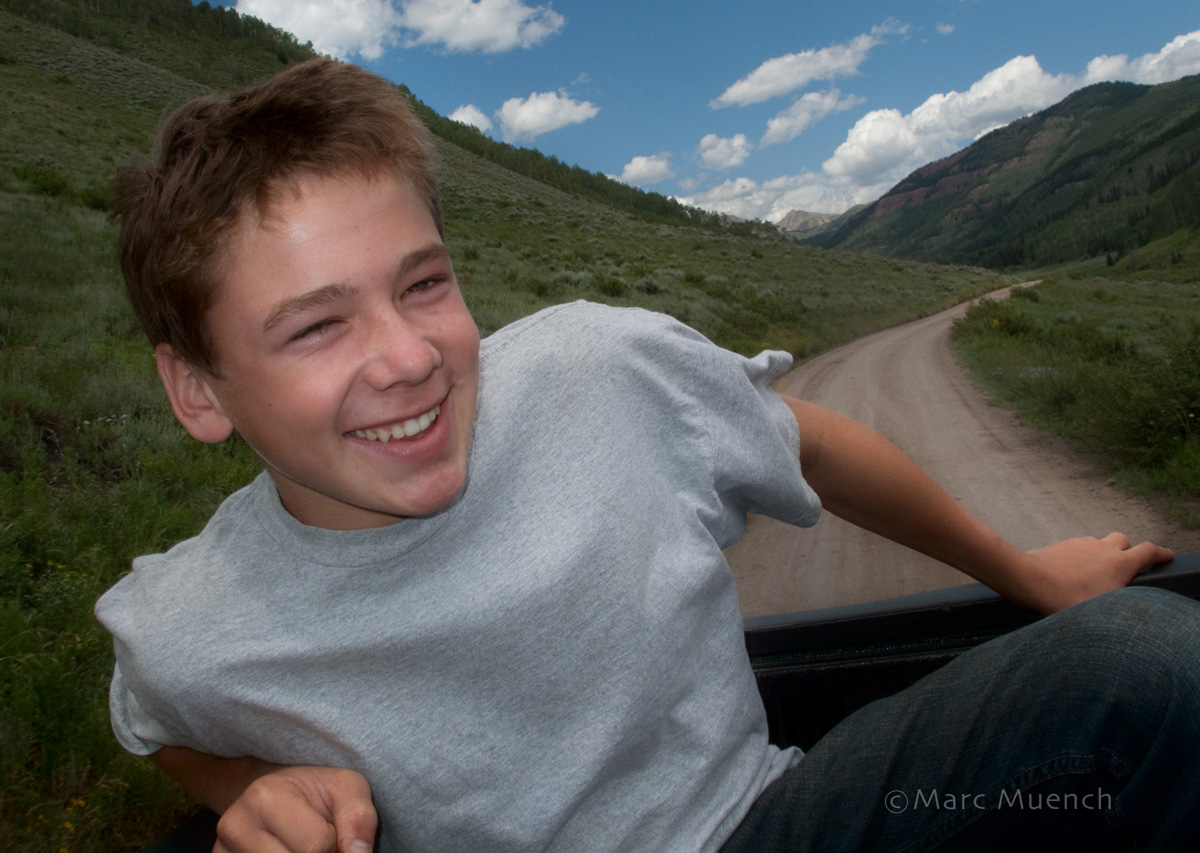
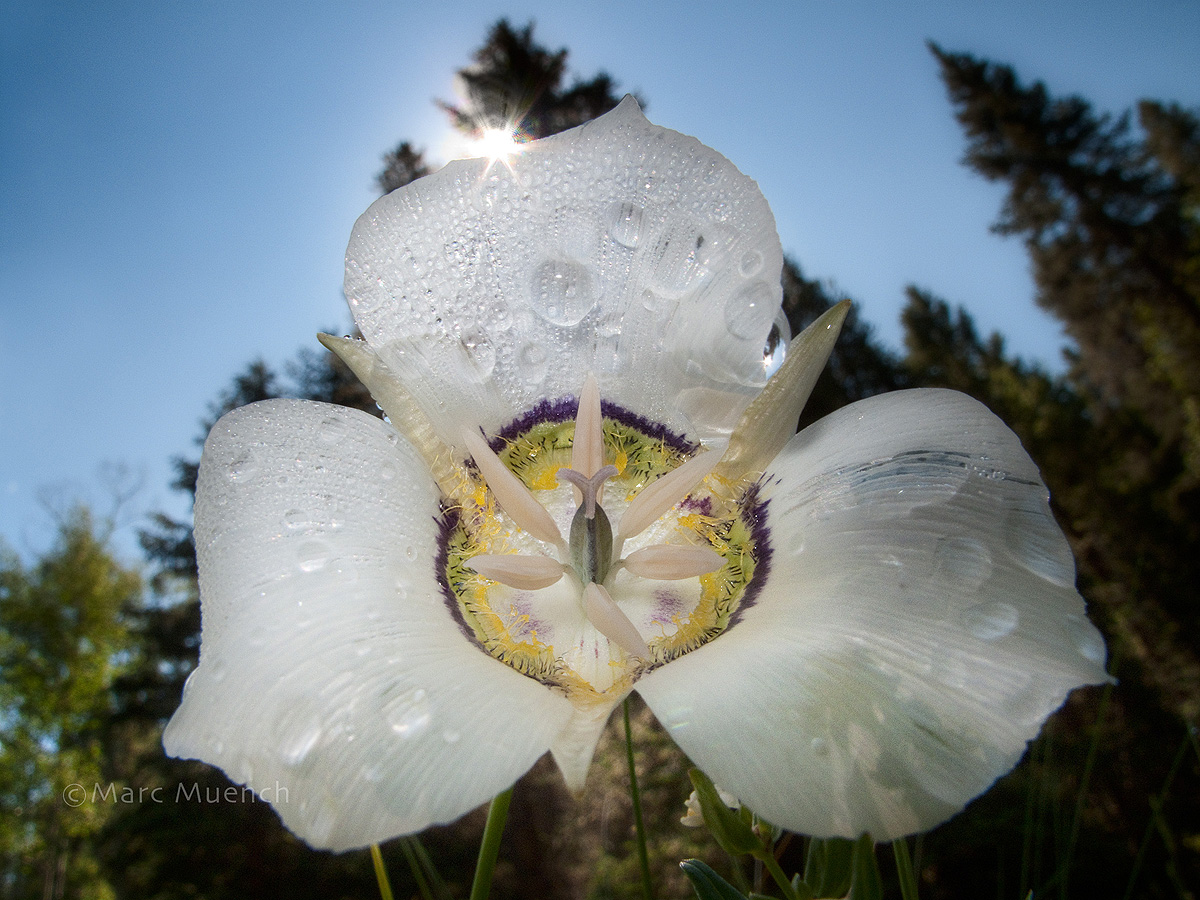
The image of my son was taken at the spur of the moment while riding in the back of a pickup way up high in the Colorado Rockies after a long hike. The flower image was taken handheld as well. There is so much to do with a pocket camera it just depends on how you perceive it! My friend Andy Williams carries two point and shoots, one for IR and the other for color. Whatever it takes for you to change your perception of the point and shoot, try it!
Life is so very short. Take pictures of it.