I’ve seen nature perform.
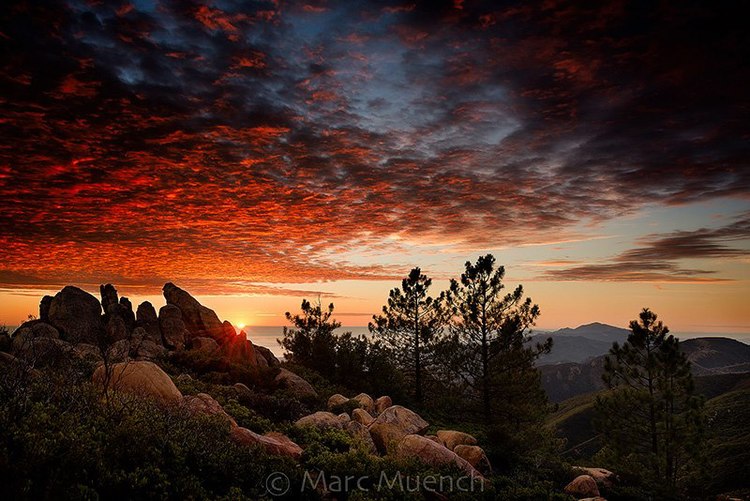
Incredible sunrises and sunsets, unique light bursting through a break in a storm, and spectacular waterfalls with sunlight glistening through, are all moments of my life that I will not forget. The impression of these moments is what I work at reproducing through photography. The method of “Manual Blending” is my favorite post-processing technique. This technique gives me command of what parts of each of the bracketed image files to use, along with the power of deciding where more or less luminosity should be added or subtracted. As the photographer with the memory of the moment, I am in command of creating the final image.
This article offers techniques for how I shoot for HDR image processing and offers a link to the video tutorial that explains how I use Lightroom and Photoshop to manually blend multiple bracketed image files together into one, to create a realistic High Dynamic Range scene. The video will give you step-by-step instructions on the technique and is the first of several, explaining how I use different software for combining bracketed image files taken of scenes with a greater dynamic range than the camera offers.
If you understand how to use Photoshop layers, merge various image files, and paint/adjust layer masks, the sky is the limit for your own personal creative vision. Of course, there are certain scenes that make manual blending a challenge. In those situations, I use either Nik HDR Pro, Photomatix Pro, or Photoshop HDR. That will be the topic of part 2 in this series.
How to shoot for Manual Blending
Assuming you find a scene with a wide dynamic range, do the following:
- Set camera for “auto bracketing” This can be either 3 – 5 or 7 exposures 1 full stop apart.If you are not sure of how many exposures, lean to more, as they can always be deleted later. Tip, take one normal exposure first and review the histogram. If the data is crawling up both the left and right side of the graph, this would be a reason for shooting multiple bracketed exposures.
- Change bracket order to “under – normal – over”. This helps in 2 ways. The first file is timed in the event you are photographing something moving, the fastest shutter speed is first. Also, the images show up in Lightroom in an identifiable order.
- Use highspeed frame rate for handheld bkt sequences and a “Live view” for all tripod bkt sequences. By utilizing a high frame rate during handheld autobracketing sequences, there is a much better chance the files will line up in post processing.
- By utilizing “live view” during tripod work there is a much better chance the files will be sharp. Since the mirror is locked up in “Live view” vibration is usually eliminated. Use a cable release or remote trigger while working on a tripod. Tip, If this is your first attempt, I highly recommend shooting a backlit scene with the sun hidden, and very few intrusions through the horizon. This will make the masking in Photoshop much more simple.
Life is short, take pictures!