“Seeing” an image requires many aspects of ourselves, both mental and physical. There are times we stumble right over an image, simply because we’re thinking of something completely different. I’m not going to discuss those mental and physiological dilemmas, but rather a physical one: contrast.
Our eyes are capable of seeing a much larger dynamic range than most of us realize, and it is only recently that some cameras have begun to equal what our eyes can do. The dynamic range of a scene, or scene brightness ratio, is the luminance difference between the darkest point and the brightest point in the scene. When you look out the window on a sunny day, there is a much greater scene brightness ratio than what you see on a cloudy day, or when you look at the interior of the room you’re sitting in. Most people don’t pay attention to this, but as photographers, we must!
When you hear of “perfect” light, all this really means is that the contrast of the light actually matched the dynamic range of your camera. If you watch most box office movies, you’ll notice that the light is perfect most of the time. This is because directors are having the set lit by professionals who understand the need to create a scene brightness ratio that the film or digital motion picture camera can capture.
The very same principles can be applied to landscape photography. The big difference is that in landscape photography we don’t have control of the scene brightness ratio. We do have control of timing and point of view though, which provides plenty of creative freedom. Over the years I have tuned my eyes to notice subtle differences in the sunlight and how various atmospheric conditions change it dramatically. In still photography, we can also make use of post-processing tools which give us even greater creative freedom. Post-processing allows landscape photographers to alter the scene brightness ratio even more dramatically than any clouds or natural phenomenon. The amount of post-production or processing you apply to your images is your choice, and the sky is the limit. Personally, I prefer to begin my creative process with the best light I can capture, as this always makes the post-production much simpler, and usually creates far superior work. Here is an example of an image that had great light and would, therefore, require very little post-production work.
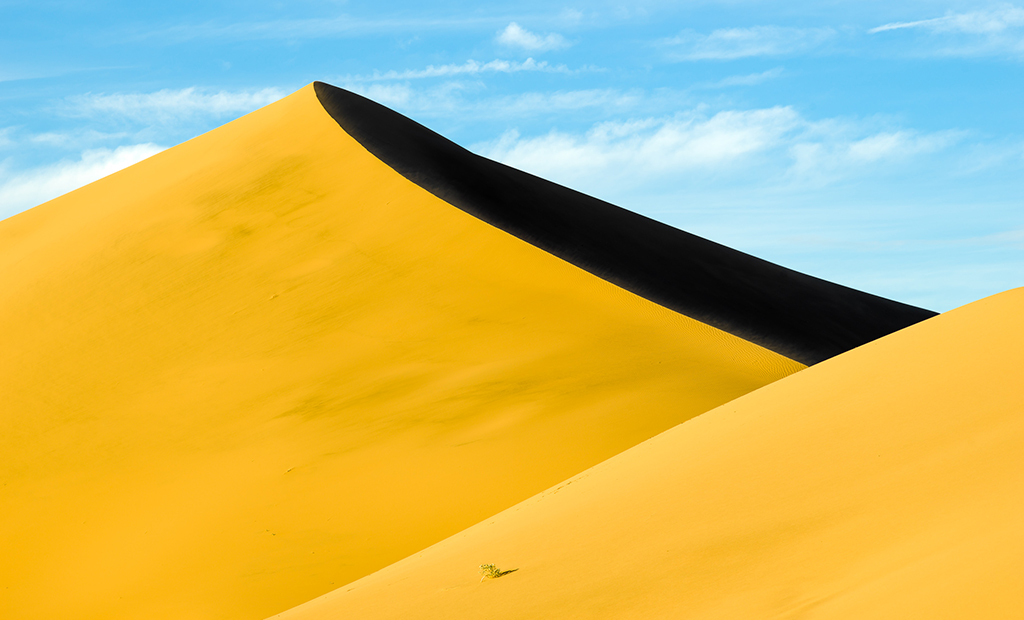
This was captured in the late afternoon when the atmosphere blocked some of the sunlight, thus lowering the scene brightness ratio by just enough to enable the camera to capture some of the shadow details on the backside of the dunes.
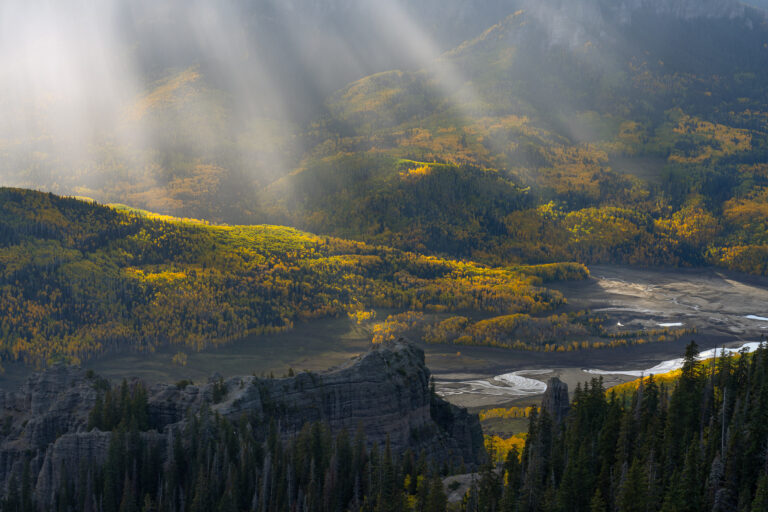
Here are a few examples of scenes where I knew ahead of time that I would need to edit the scene brightness ratio in post-production. The first scene was captured from a helicopter over a braided river in the early morning. Because the river was in shade, there was very little contrast. When I reviewed the histogram in the camera, I realized there was a much lower scene brightness ratio than the camera was capable of capturing, and that I would need to adjust it later in post, to create the look I wanted to achieve.


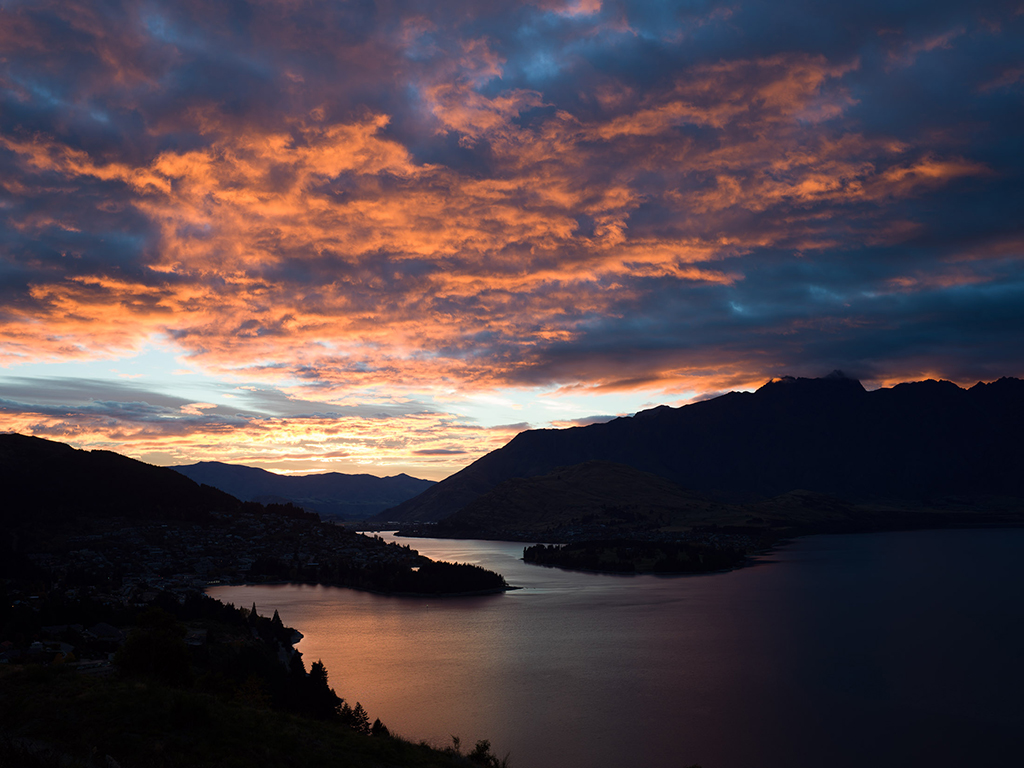
The next example is typical of an early-morning or even late-day scene. The colorful sky contrasts strongly with everything below the horizon, and the scene brightness ratio is very large. I knew this was the case just after reviewing the data in the histogram. Because of the clipping that was occurring in both the highlights and shadows, I would need to edit the contrast in post-production. Removing contrast (obtaining additional information in the shadows and highlights) in digital imaging is more difficult than adding it, as with the image of the braided river. When attempting to capture a scene brightness ratio that is larger than what the camera can capture, most photographers use a technique called high dynamic range (HDR). This method captures additional image files of lesser and greater exposure value to obtain additional information in the shadows and highlights.
The best way to learn how to deal with scene brightness ratio in nature photography is to practice as much as you can. The exercise I recommend is to capture hundreds of various images over an hour in as many different conditions as possible, then go review those files, looking mainly at the histogram and noticing which images look good and how the histogram looks. After you’ve repeated this process many times, your eyes will develop a natural sensitivity to the light, and you won’t need to rely on the histogram as much.
When you study imagery, you will begin to notice that in many of your favorite images, the light is great. If the light is great, now you know why!