
It was dark! In fact, I could not see much more than a few outlines of the larger features. I could hear the surf but it was still a ways off. My camera was on my tripod and thrown over my shoulder as if I was cruising down main street in the middle of the day.
However, I was walking across slippery, wet, and uneven rocks on my way out to a vantage point I had never been to. I was in Maine in the dark. The wind was pushing low clouds by at a nice slow pace and the seas were fairly calm, all signs it was going to be a perfect morning for long exposures. The clouds and the surf moving would be fantastic for adding movement to the scene. I was getting excited and I still did not know if the vantage point that I thought might look back at the lighthouse existed. Then in a swift graceful swoop, I was on my rear with my free hand jammed beneath some rocks. It hurt a bit but I was still too cold and tired to notice anything wrong. I finally grabbed for my headlamp which was exactly where you don’t want it, in my pack and not on my head. I really don’t like to use flashlights in the hope of allowing my eyes to adjust thus making it easier to compose a picture in the dark. I managed to flash on my headlamp and realized one of my fingernails was not looking so good. I rinsed it off in a tide pool, wrapped it in a napkin, and went to work. The first images came out dark and then progressively got brighter as dawn approached.
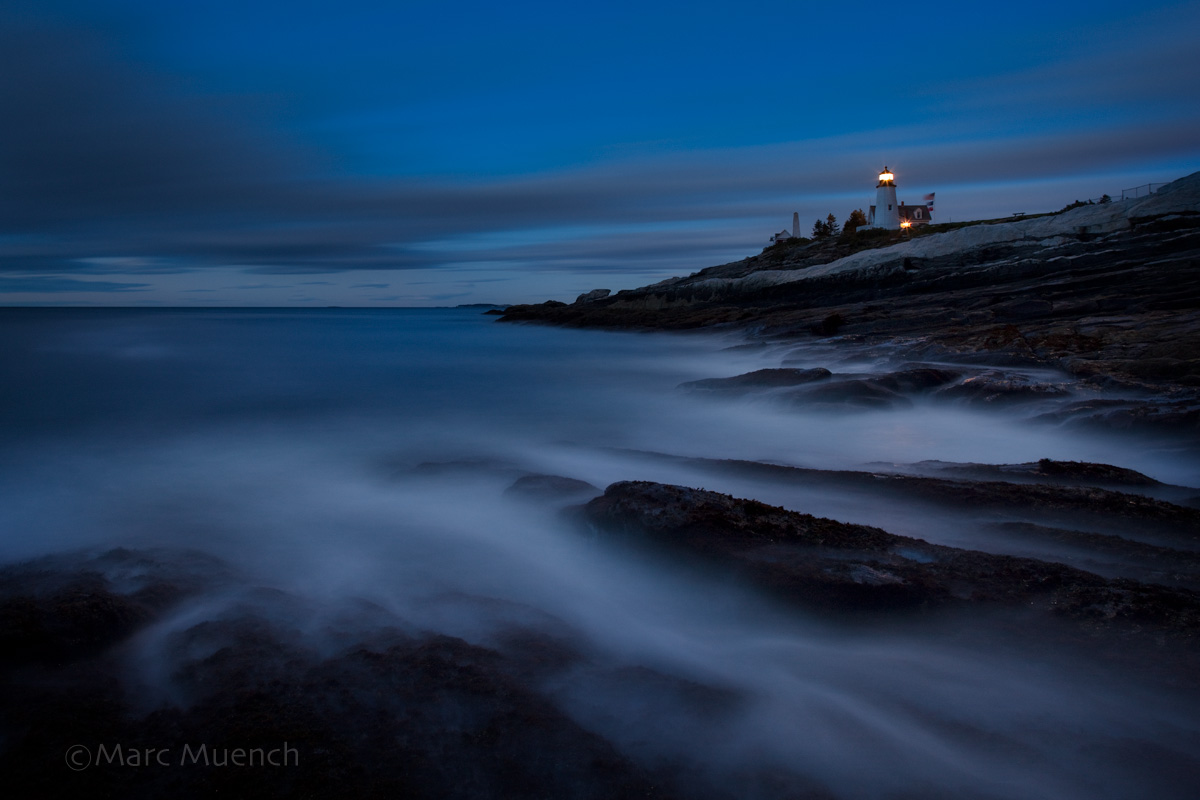
What I did next is why I am writing this post. I noticed that the first images taken in the dark were far more interesting. The normal method for shooting in low light is taught to create a good-looking histogram with the highlights and blacks all mapped out in good places. However, like all rules, they can be broken. What I have noticed lately is that with the new high ISO cameras it has become easy to turn night into day. As cool as it looks to view the scene with little to no noise the effect of night is lost.
Here I’ve used Adobe Camera Raw to illustrate the difference between the exposure I made and the proper exposure. In order to do this, I moved the exposure slider to the right two stops.
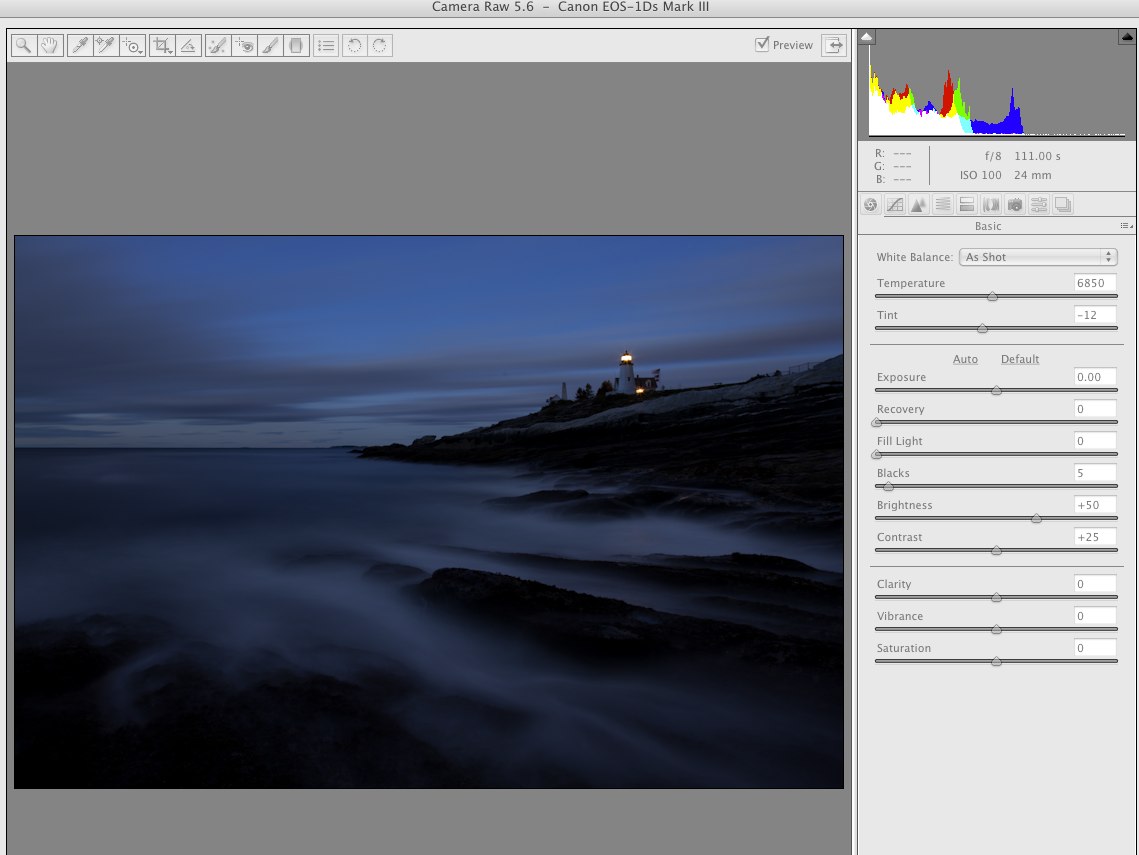
When I ask folks why they like their new cameras, the most common answer is for the low noise at high ISO. As exciting as this may be it does not mean the images need to be brighter! If you wish to make your images optimally exposed, then push the right side of the histogram all the way to the right side so there is little to no blank graph showing as in my example.

This is the usual practice for digital cameras because there is twice as much data in the highlights as there is in the shadows of all digital files. This information is great to recall when taking the picture but not so good when making the picture. My usual method is to expose the image with the mountain of data in the middle, or as I like to phrase it, the mountain in the middle. I then make the entire image darker in post by dragging the exposure and brightness sliders way down. However, at night this means your exposures are extremely long. My exposure for this image was 111 seconds. Had I made the exposure adjustment in-camera without changing the F stop or ISO, I would have been there for 433 seconds. By the time the exposure was done, I would have either been tanning myself in the sun or bleeding to death. In low light situations, I always consider what the image should feel like to the viewer, bright or dark and moody. Just don’t forget to make your images with a purpose, even if that means deviating from the rules.
Life is so very short. Take pictures of it!