
This post has been updated on May 25, 2017 and again on March 27, 2024.
Having just returned from an epic workshop to The Galápagos Islands, I thought it would be good to jot down my feelings regarding how to get the most out of your Galápagos photography trip, photo ops, camera and lens choices, and other gear you’re considering for your Galápagos trip. Oh, by the way, we’re going back, May 2025. There are plenty of options for The Galápagos – but if you’re serious about photography, I really recommend a photo-specific trip! The reason for this is that every island visit is geared around photography–you’ll be first on the islands, and last to leave, maximizing the potential to capture great wildlife in great light. You’ll be among a group that is like-minded, and not “rushed along” to the next spot on the itinerary. We work hard to make sure this happens on our workshops.
Seeing
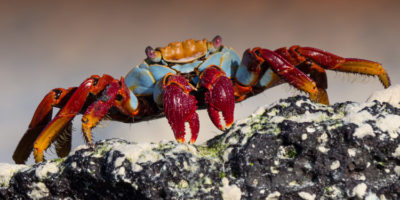
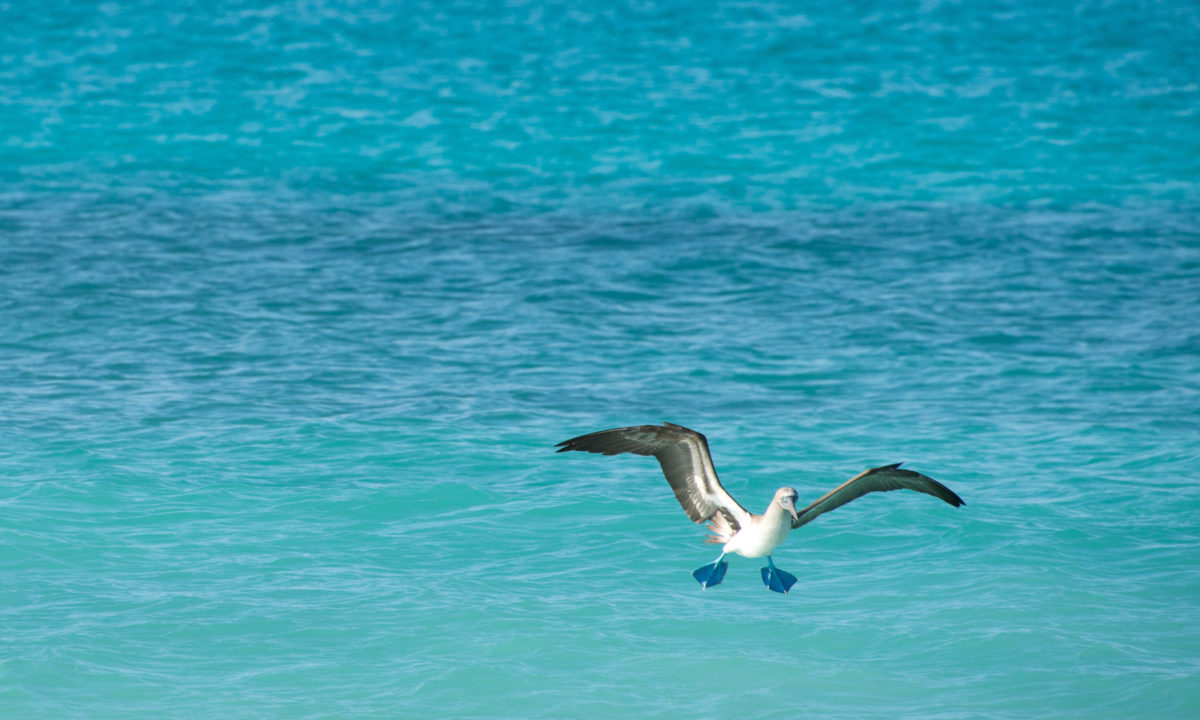
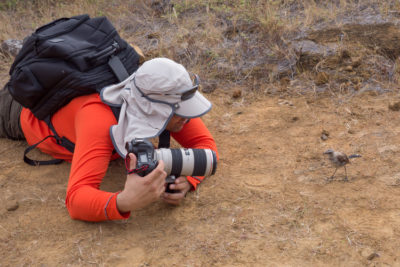
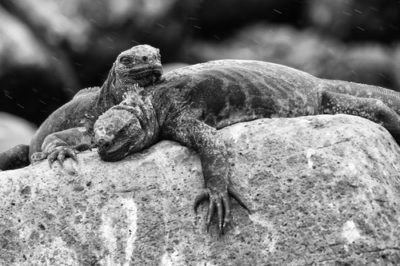
Yep – as trite as it sounds – ANYone can take a photo of a Sea Lion, Blue-Footed Booby, or Sally Lightfoot Crab – but the key to amazing photos is how you see and compose the shot! Lazing Sea Lions on the beach? Get down low (belly on the sand) and have some birds or cool crashing waves in the background. Blue Footed Boobies? You’ll see them aplenty. Create interesting images by showing their interaction, beaks, preening, foot-lifting, etc. Sally Lightfoot? Get her at EYE LEVEL! Yeah, you’ll probably want kneepads for these shots. Bring them. Stay away from “clinical” shots that you’d find in a textbook and strive for something way more interesting! There are so many opportunities for creative compositions with the wildlife in The Galápagos – and this is something we teach every day and night on our workshops.
Cameras and Lenses
If you’re serious about your photography, you’re going to agonize about gear for this trip, that’s understandable! I can make it easy. You’ll of course need two cameras (in case of failure or accidental damage). You will be VERY close to many animals, and then of course there are some you’ll need “reach” for. My recommended kit is as follows:
A fast-focusing and responsive Mirrorless system, Sony, Canon, Nikon, Olympus 4/3s
Lenses: In general, zooms are your friend, giving you the most flexibility. You can be very successful in Galápagos with just two lenses, a 24-70 and a 80-400 or 24-150 and a 100-400.
Don’t ignore the Micro 4/3s systems out there. The image quality, lens choices, size, weight, and body performance of the latest micro 4/3s systems are very good.
If you carry a kit like I’m describing, you’ll never miss a shot. Keep in mind, the island visits are sort of “scheduled” and while we definitely spent more time at great sightings, you’ll have to be able to keep up with your Naturalist Guide. Not being bogged down by too much gear is important. Of course, on our workshops in Galápagos, we’re all photographers, so we get on shore first in the morning, stay as long as possible at great sightings, and we’re the last to leave in the evenings. This is an important factor to consider when planning your Galápagos photography trip – you can’t do this when you’re part of a general tourist “tour”.
Having that 400mm lens on a crop body gives you a 600mm field of view, and is quite handy for the smaller creatures that might be a bit off the paths, like lizards and Sally Lightfoot crabs. Remember, in The Galápagos, you can’t venture off the trail so sometimes the extra reach comes in super handy. Some of you are thinking: Andy, why not my 200-400mm Nikkor or my 200-400 Canon, or my 500, 600mm primes? Simply put: they are way too heavy and difficult to handle and use on the Islands in Galápagos. One needs to be light, nimble, and quick – and so that’s why I recommend the 70-200, 80-400 or 100-400 zooms. There are some great 4x 150-600 zooms from Tamron and Sigma as well. To be clear: I’m not saying that you can’t use the super long Canon or Nikon Teles – I am saying that there are really good alternatives and you’ll be happier with something easier to handle.
So there you have it, as far as camera systems. Focals from 24mm to 400mm (even 600) in two bodies. And backup! Oh, you’re asking about other lenses, eh? If you have the space, bring along a macro lens, and a super-wide lens like a 16-35.
Accessories
First, the obvious: plenty of batteries (at least two for each camera) and chargers; lots of SD/CF cards (I like to travel with enough SD/CF so that I don’t have to format any cards while traveling); laptop with current software; external hard drive to back up your images (or enough disk space on the laptop). Lens cleaning cloths, a rocket blower.
Filters: you’ll need Circular Polarizers for your main lenses, and contrary to my general beliefs, a UV filter for protection (water, sand and the big bugger is sea mist). ND filters if you intend to try for some slow shutter work on the waves/beachscapes.
Tripod: a tripod is difficult to deal with because of the lack of time at each sighting but can be used at first landing or last light on some shore landings, and there will be some opportunities to do slow shutter work for beachscapes – but you can create amazing images in Galápagos without a tripod, especially with the high-ISO performance of today’s cameras. If you bring one, make sure it is super light! If you want to do slow shutter work on the beach, then bring your ND-10 filter!
Gear Protection
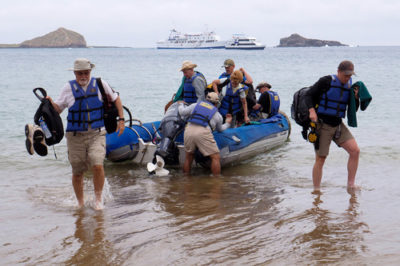
“Wet landings” are really easy for the most part. The panga (zodiac) lands on a beach, and you swivel out into typically at-most, knee-deep water. There’s always a crew member there to help you with your bag. Are dry bags necessary? That’s really up to you. We prefer to be “light, nimble, and quick”—carrying only what we really need in order to get the shot! For Galápagos, this usually means two camera bodies, one with a 24-105 (or similar) and one with a 100-400 (or similar) on board. Stash an extra lens in a pocket of a small pouch-type sac, add spare battery, lens cloths, memory cards, filters, and really you’re done. We put one camera on our neck in the zodiac, and one in a holster bag inside a small 30L dry bag backpack. Don’t forget a waterproof case for your smartphone.
Speaking of Backpacks
You’ll likely travel from home to The Galápagos with a camera backpack (we love the Backlight bags by MindShift!), but for your island visits, you’ll also want something smaller, to carry your 2nd camera and lens, spare battery, wipes, etc. Try the above-linked Sea To Summit Dry Bag pack, or even this one from Amazon.
Underwater Shooting
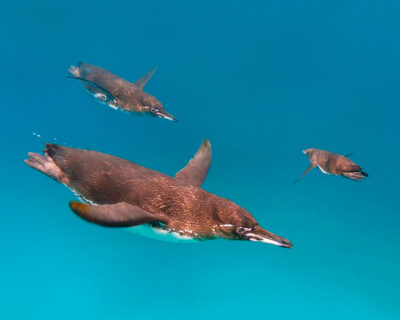
You will have many opportunities to snorkel, take advantage of them! Even if you aren’t a great swimmer, do it – the wetsuit you’ll wear provides excellent buoyancy – and the guides and panga drivers are always close by. The snorkeling in Galápagos is excellent! You’ll swim with sea lions, Galápagos penguins, and Whitetip reef sharks (don’t worry!), and multitudes of fish, sea stars, rays, and more. Truly a magical experience and most any camera will do! If you are an underwater photographer, you already know your gear and what to bring. But for everyone else, my recommendation is to simply use a GoPro on a floaty-grip-stick, which you set to “time-lapse” mode (it’s continually shooting photos) and just point your camera at the fish as you are snorkeling. You’ll be pleasantly surprised at the quality of photos you get with this setup!
Clothing, Etc.
Do not bring much cotton for wearing in Galápagos. Have quick-dry sport t-shirts and shorts, and maybe one pair of quick-dry longs … you’ll be glad you have them, the panga seats can be damp! Also, you can easily wash these items in your shower on board, and hang them out to dry. Footwear? You do not need hiking boots! Recommended: 1 pair of Merrill/Keen water shoes with closed toe area and heel strap, and a pair of Teva or similar sandals. That’s really all you need, trust me. Bring a light rain jacket in case of foul weather. Add: bathing suit, hat, sunglasses, sunscreen, a fleece pullover for cool nights, and you’re done.
Physical Fitness
This isn’t a week lounging on the beach in the Caribbean! Expect to work hard, every day. If you’re on our photographic workshop, you’ll be up before 6:00 AM and we’re on the islands as soon as the park allows at sunrise. Trails on the islands are fairly gentle and most anyone can handle them – there are walking sticks on our boats for those that might want a little more stability. Still, you’ll want to be ready for two on-shore excursions each day, where you’ll walk for a couple to three hours. And then there are the opportunities for snorkeling – don’t miss out on these chances! We always have some downtime in the afternoons, then it’s off to another island excursion, followed by dinner and then critiques or instruction.
The Food, and What About Sea Sickness?
Food on board is first-rate! There’s always a choice of meat, fish, and plenty of veggies. It’s important to ease into the new cuisine when you arrive in Ecuador – let your system adjust in small steps. On arrival in Guayaquil, try to eat “familiar” foods and get into local Ecuadorian specialties gently – you’ll have a day or two before you set sail to adjust. Many who go to Galápagos have never been on a boat before, much less for 7 days and nights… if you are prone to motion sickness, don’t let this stop you from a trip of a lifetime. The Transderm Scop patch is very effective, and I recommend talking to your doctor about it. On our yacht, we always inform you when we’ll be navigating, so you can prepare – some folks like to take a Bonine as well for the times the yacht is underway.
I hope this has been helpful, photographing in The Galápagos is truly a special thing to do!
Enjoy (Galápagos) photography,