I have always been infatuated with the night. As a child, I would camp with my family in the Rocky Mountains. I remember being fascinated with the way the moonlight played upon a grove of ponderosa pine. We would spend many nights out in the desert, only lit by the stars above. The landscape transformed once our eyes adjusted. It was always about being in places that I loved, away from the city lights in the middle of nowhere, where the stars were in the billions, and the landscape was pristine.
I had a small SLR camera and a cheap wide-angle lens. I borrowed my mom’s flash and would try to create images when there was no moon. I would lock down my shutter and walk out into the distance, holding the flash in my hand, trying to replicate the moon. I would impatiently wait for the two weeks it took for my slide film to show up in my mailbox. It’s interesting to me how much my methods have continuously evolved.
I’m still experimenting and striving to find better methods to replicate moonlight and eliminate high ISO noise. I love coming up with creative ways of teaching this craft of photographing nightscapes—from scouting to being safe, from lens selections to camera settings. I want to make sure that everyone captures everything they need out in the field so they can create a memorable photograph once back at the computer.

SCOUTING AND SAFETY
Once the sun goes down, well… it gets dark, and you can’t see. It is vital that you can make it safely back to your camp or vehicle.
- It’s important to scout during the day. Let the sky be secondary to the landscape you’ve chosen to photograph. The blue sky is void of any interest but will be filled with stars when you return at night. I encourage and teach the use of PhotoPills and Sky Guide to align the stars with your chosen landscape. Make sure to mark your waypoints with a GPS once you find a composition. I use GAIA GPS for my personal outings and during workshops.
- A good headlamp with extra batteries is critical. I always recommend having a spare headlamp in case a malfunction occurs.
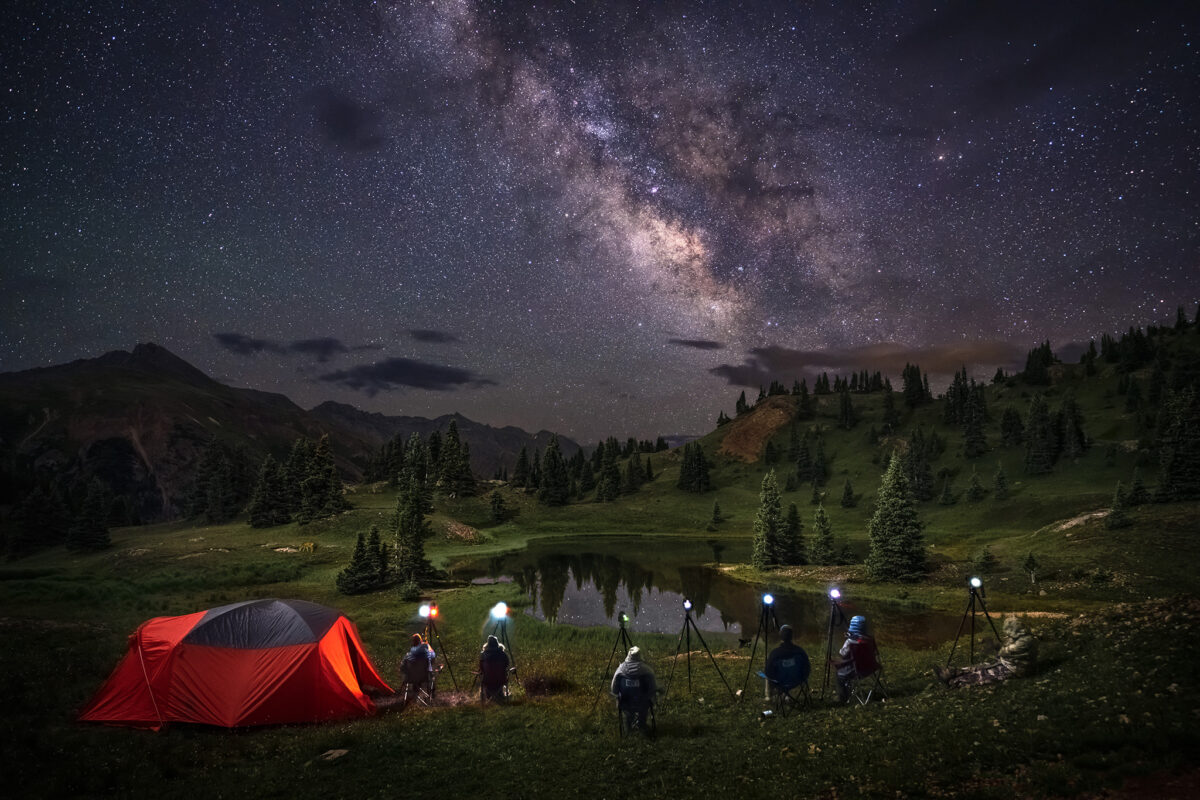
- Make sure you have adequate water, food, and clothing. It’s important to be comfortable out there. Know what the weather is going to do. If you’re not going to be far from your vehicle, consider taking a comfy camp chair. While your shutter is open, it makes the experience of looking up at the stars much more enjoyable.
COMPOSING IN THE FIELD
You already have a head start on composing a good scene by scouting during the day. It is helpful to set up your composition before nightfall. If you arrive at a location and it’s already dark, here is what I recommend:
- Make sure your tripod is good and steady. Pushing it firmly into the ground is critical. Tripod spikes are helpful with this, but we recommend rubber feet around fragile sandstone and rocky areas that contain rock art such as petroglyphs and pictographs.
- Set your camera to manual focus and point it in the direction you want to photograph. Your lens should be close to infinity focus.
- Set your ISO at a high setting, such as 12,800, and take a short 20–30 second exposure. This will allow enough light to show detail on the back of your LCD screen so you can quickly make minor adjustments to your composition. Once satisfied with your composition, you can change your ISO settings to a more manageable setting.
FINDING CRITICAL FOCUS
There are many ways of finding critical focus. There is one way that is foolproof and is the only method I teach.
- Make sure your lens is close to infinity focus and your live view is on and find a bright star, preferably in the middle of your LCD screen.
- Press the zoom button on the back of your camera to zoom in on that single star.
- Slowly adjust the focal ring on your lens, making the star appear as small as possible. Once you have achieved critical focus, don’t touch your lens again. By doing this at the very end of the camera set-up, it eliminates the chance of focusing errors.
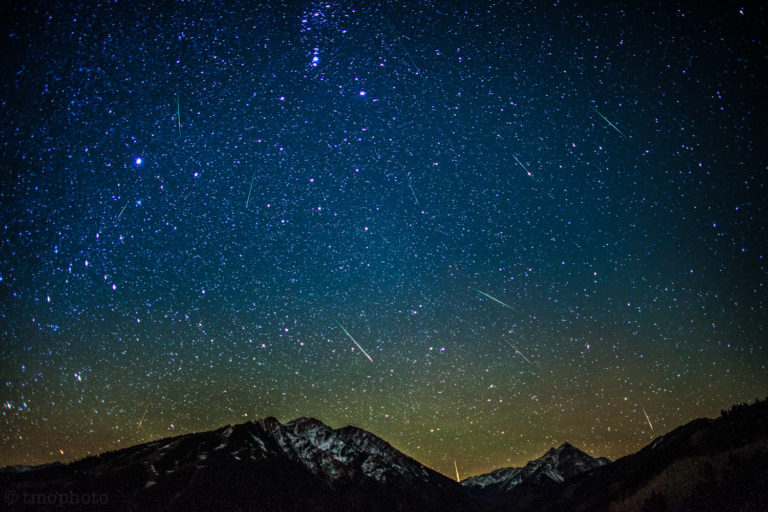
ACHIEVING PINPOINT STARS
- The higher the mm of your lens, the shorter your shutter speed must be. If you’re going to take a single image of the sky, I recommend the stars not elongate any further than three times the length as the star is wide. Using this method, you would not notice any star trailing if you were to print a 24 x 36 photograph. This is easy to determine out in the field by zooming in on your LCD screen.
- Using a tracker, you can take long exposures at a low ISO to get a very clean sky with pinpoint stars. The tracker rotates the same as the Earth, thereby tracking the stars. You must take separate images of your foreground because the tracker’s movement will render the foreground blurry.
PHOTOGRAPHING THE FOREGROUND
Using well-placed lights can enhance the foreground. Mimicking moonlight and using light for visual flow can help to keep the viewer’s eye within the scene. Some scenes don’t need any light. Some National Parks don’t allow the use of any artificial lighting.
- Lights should be on a very low setting, barely visible. Try to set up your lights indirectly and never behind you. You want to create shadows and interest in your scene.
- If using only starlight (which is very flat), your foreground must be strong enough compositionally to carry the photograph. Long exposures using a lower ISO can make a virtually dark scene come to life.
There is nothing more magical than being in some of the darkest, most beautiful places in the world. A place where you feel you could reach up and touch the heavens. To be able to capture a star filled sky along with an impactful landscape is truly gratifying. No matter how many times I find myself out in the field doing what I love at night, it always takes me right back to my childhood.